Building Construction Process: Start to Finish
Step 1: Planning & Architectural Design
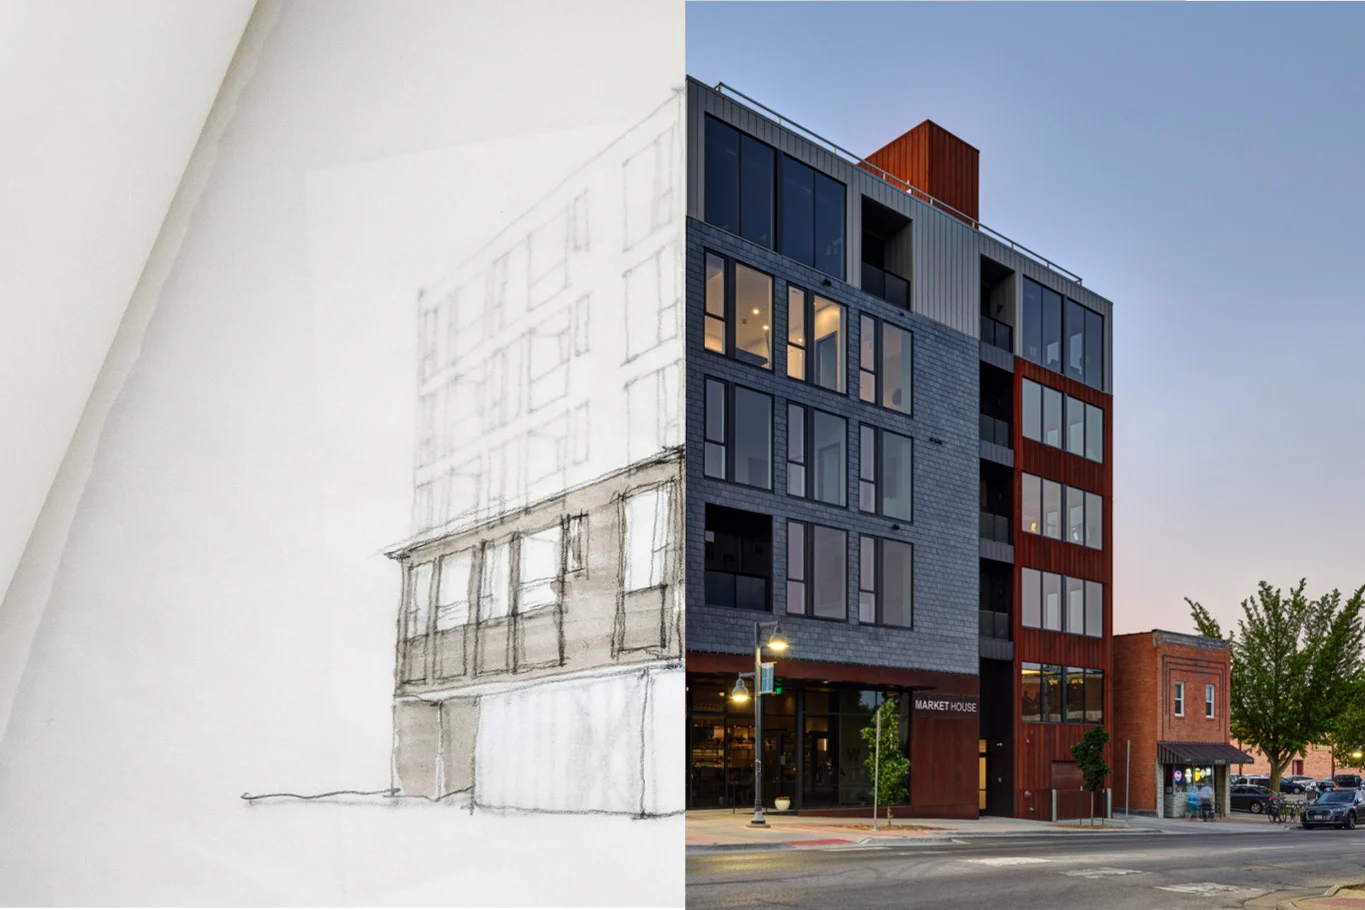
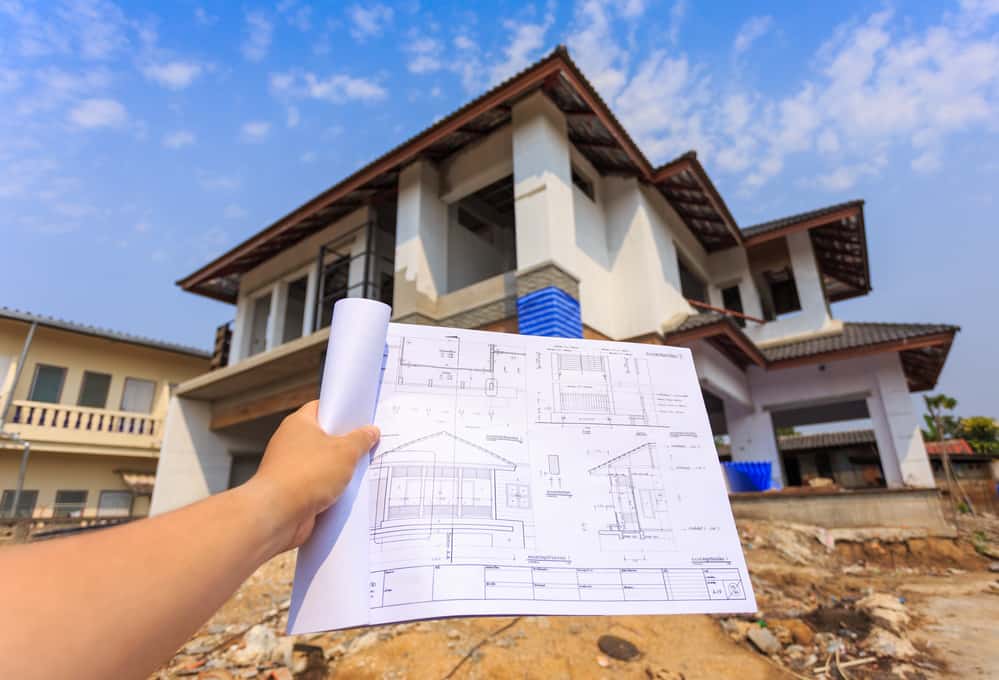
Every successful construction project starts with a strong and strategic planning phase. This stage lays the groundwork for the entire project, ensuring that every detail — from space usage to structure safety is well thought out. It’s where vision turns into blueprint.
The planning phase begins with understanding the purpose of the building, its users, budget constraints, and future expansion needs. Architects and designers collaborate closely with clients to conceptualize the look, feel, and functionality of the building. Important factors like location, site orientation, sunlight direction, ventilation, access points, and environmental impact are evaluated.
A comprehensive feasibility study is often conducted during this stage to assess legal, technical, and financial viability. This includes zoning regulations, site limitations, utility access, and permit requirements. Without proper planning, projects risk costly delays and compliance issues later.
Key Elements of Planning:
- Site Analysis: Understanding the environmental, geographical, and legal characteristics of the plot.
- Requirement Gathering: Meetings with the client to define needs, goals, and project expectations.
- Budget Estimation: Initial cost projections for construction, materials, permits, and labor.
- Timeline Development: A preliminary schedule outlining major project milestones.
- Consultant Coordination: Engaging structural engineers, MEP experts, and surveyors early on.
Architectural Design Phase:
Once the planning is defined, the architectural design begins. In this phase, architects translate concepts into detailed 2D plans and 3D models. This includes:
- Floor Plans: Layouts of rooms, staircases, corridors, windows, and doors.
- Elevation Drawings: Exterior views showing shape, materials, and height.
- Sectional Views: Vertical cuts to show relationships between different building levels.
- Structural Designs: Integration with civil/structural engineers for column and beam placements.
Advanced software like AutoCAD, Revit, or BIM tools are used to produce high-precision models that guide the project from paper to site. These designs are constantly reviewed for aesthetics, efficiency, safety, and compliance.
Approval & Coordination:
Once architectural drawings are finalized, they are submitted to municipal and local development authorities for approvals. This ensures the project complies with building codes, safety standards, and zoning laws. During this time, coordination between architects, engineers, consultants, and legal experts is crucial to avoid future disputes or stoppages.
This entire stage serves as the blueprint of the construction journey where the vision is transformed into reality through precise planning, design integrity, and technical accuracy.
Step 2: Site Clearing & Preparation
After planning and design approvals, the physical execution begins with preparing the site. This phase ensures the land is safe, accessible, and ready for construction. A well-prepared site minimizes risks, speeds up the building process, and supports the structure’s longevity.
Initial Activities:
- Land Survey: Understanding the land's dimensions, elevation, and slope using modern tools.
- Site Marking: Demarcating building lines and boundary limits accurately.
- Utility Disconnection: Safely cutting off existing water, gas, or electrical lines.
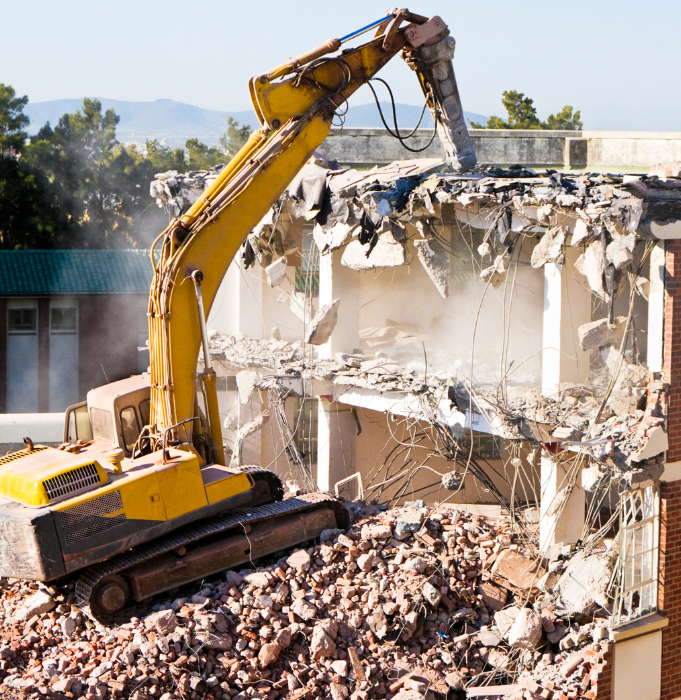
Clearing and Cleaning:
Once marked, the site is cleared of vegetation, rocks, old structures, debris, and waste material. This step makes space for excavation and foundation work.
- Vegetation Removal: Cutting down trees, grass, bushes, and roots that may interfere with construction.
- Demolition: Removing old buildings or structures on-site, using manual or machine methods.
- Debris Management: Collecting and disposing of waste responsibly as per environmental laws.
Clearing, Soil Testing & Grading:
The site is cleared of unwanted vegetation, trees, rocks, and debris. If any old structures exist, they are demolished safely. All waste is removed or recycled responsibly. This is followed by comprehensive soil testing to assess strength, moisture content, and compaction. Based on findings, the ground is leveled or filled as required to match design slopes and ensure drainage.
Temporary Site Setup:
To prepare for upcoming construction phases, temporary site infrastructure is also set up. This includes fencing, safety signage, water and electric supply for tools, and site offices or shelters for the workforce. These setups ensure safety and smooth workflow from day one.
A clean, safe, and well-graded site now paves the way for the next critical step Excavation and Foundation Work.
Step 3: Excavation & Foundation Work
With the site cleared and prepared, the next major milestone is excavation and laying the foundation. This phase sets the structural base of the entire building and requires accuracy, safety, and adherence to engineering specifications.
Excavation Process:
Excavation involves removing soil to create space for the foundation, basements, or underground utilities. The depth and dimensions depend on the building type, soil condition, and local building codes.
- Marking & Layout: Site engineers mark the trench lines and pit boundaries as per structural drawings.
- Earth Excavation: Soil is dug using excavators or manually, ensuring no underground utilities are damaged.
- Side Sloping: Trenches are supported or sloped properly to prevent cave-ins and maintain safety.
- Dewatering (if needed): Water is pumped out from the excavation area to keep it dry and workable.
Foundation Type Selection:
Based on soil test results and load calculations, the type of foundation is decided. The two most common types are:
- Shallow Foundation: Used for low-rise buildings or strong surface soils. Includes isolated footings, combined footings, and mat foundations.
- Deep Foundation: Required for weak soils or tall buildings. Involves pile foundations or drilled shafts to transfer loads deeper.
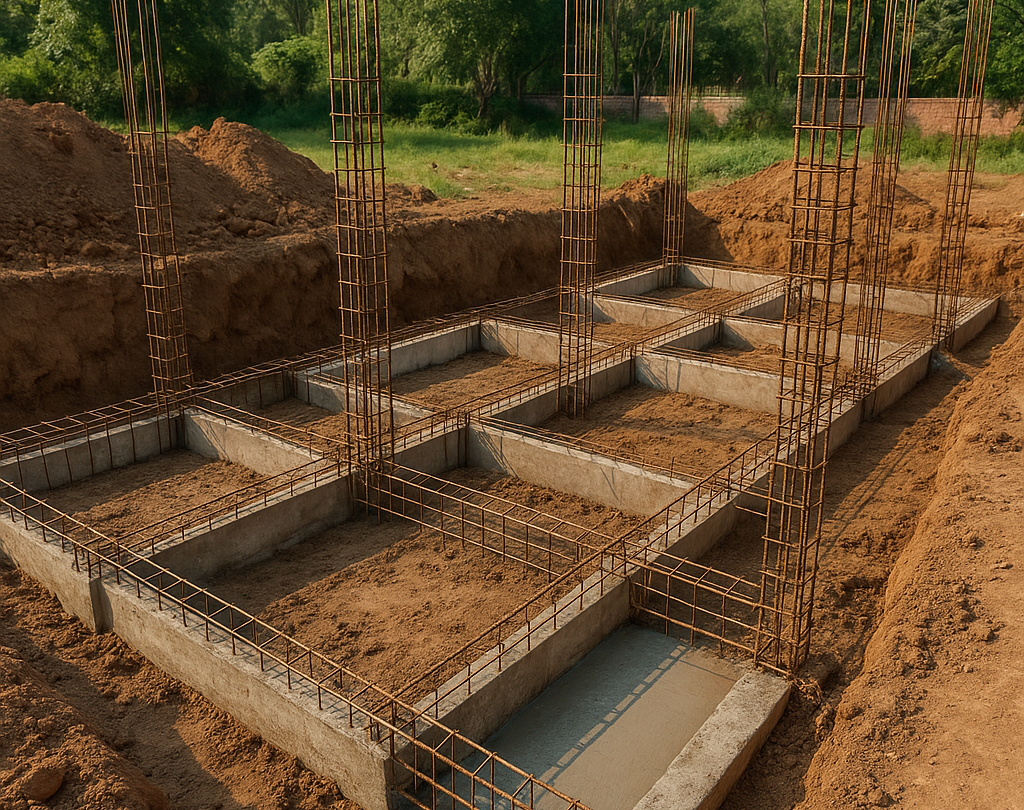
Foundation Construction:
Once excavation is complete, the foundation is laid in stages:
- Compaction & PCC: The base is compacted and a Plain Cement Concrete (PCC) layer is poured to provide a flat, stable surface.
- Formwork Installation: Wooden or steel molds are set up to shape the foundation structure.
- Reinforcement Placement: Steel bars (rebar) are arranged as per structural plans to strengthen the foundation.
- Concrete Pouring: High-grade concrete is poured, vibrated to remove air gaps, and cured properly.
Waterproofing & Backfilling:
After curing, waterproofing membranes are applied to prevent moisture penetration. Then the excavated area is backfilled using selected soil or sand and compacted layer by layer.
Safety & Quality Control:
Throughout this step, engineers and safety officers ensure that excavation depths, material quality, reinforcement, and concrete mix all meet design requirements. Regular inspections are conducted to maintain structural integrity.
Once the foundation is complete, the structure gains a solid base — ready for columns, beams, and floor slab construction in the next stage.
Step 4: Superstructure Construction
After the foundation is completed, the construction enters its most visible and transformative stage the superstructure. This includes all structural components built above the ground level, which ultimately define the building’s form, strength, and layout.
Structural Framing:
The skeleton of the building begins to rise, starting with vertical load-bearing components followed by horizontal connectors.
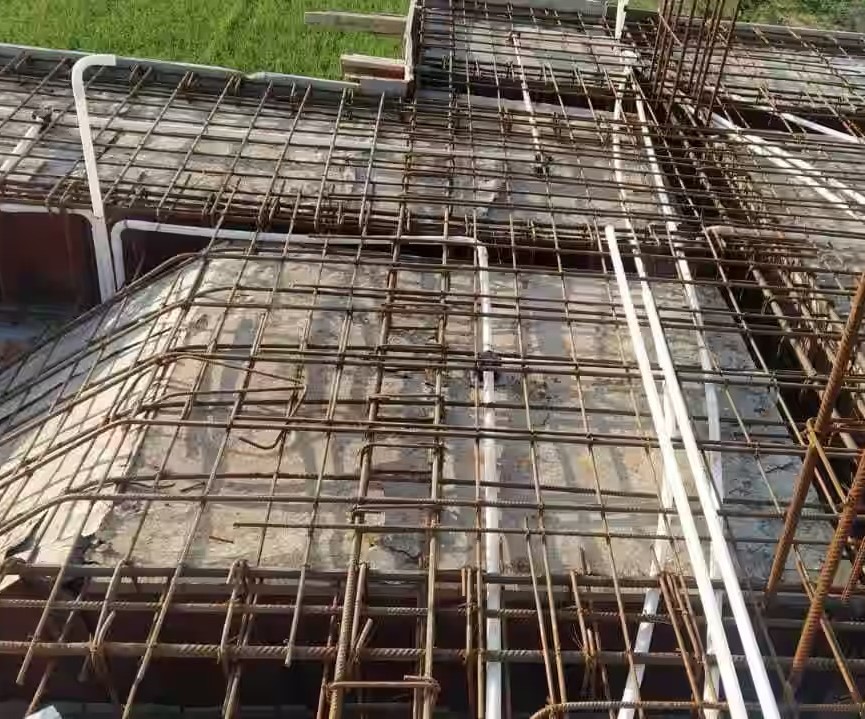
- Columns: Reinforced concrete or steel columns are erected to support vertical loads and transfer them to the foundation.
- Beams: Horizontal beams are constructed to carry floor loads and link columns together. These can be cast-in-situ or pre-fabricated.
- Slabs: Floor slabs are built between beams to form each story of the building. Proper shuttering, reinforcement, and curing are crucial at this stage.
Brickwork & Partition Walls:
After the framework is done, external and internal walls are constructed using bricks, blocks, or other materials. These define rooms, corridors, windows, and door spaces.
- Load-bearing walls: In certain low-rise constructions, walls may also support structural loads.
- Non-load-bearing walls: Used mainly for dividing space and enclosing the structure.
Staircase & Lift Wells:
Staircases and elevator shafts are built simultaneously with the floors. Proper alignment, reinforcement, and finish are essential for long-term performance and safety.
Roof Construction:
The roof is the uppermost structural element. It can be flat, sloped, or domed based on the design.
- Flat Roofs: Usually constructed using concrete slabs, often with waterproofing layers.
- Sloped Roofs: Common in areas with heavy rainfall. Constructed using timber, steel trusses, and roofing sheets or tiles.
Utility Conduits & MEP Provisions:
During the superstructure phase, basic mechanical, electrical, and plumbing (MEP) conduits are laid within walls and slabs.
- Electrical conduits and junction boxes for future wiring
- Plumbing lines for water supply and drainage
- HVAC ducts and core cutouts if required
Curing, Safety & Structural Checks:
Every structural element is cured properly using water or curing compounds to avoid cracks and ensure strength development. Site supervisors and structural engineers regularly inspect for alignment, reinforcement placement, and load-bearing capacity.
Once the superstructure is fully completed, the building now has its final shape and is ready for the next stage: finishing work and architectural detailing.
Step 5: Masonry & Partition Walls
Once the superstructure is complete, the focus shifts to building internal and external walls a vital part of shaping rooms, hallways, and overall building layout. This stage also contributes to thermal insulation, acoustic separation, and fire resistance.
Types of Masonry Work:
Masonry can involve a range of materials depending on structural needs and design goals:
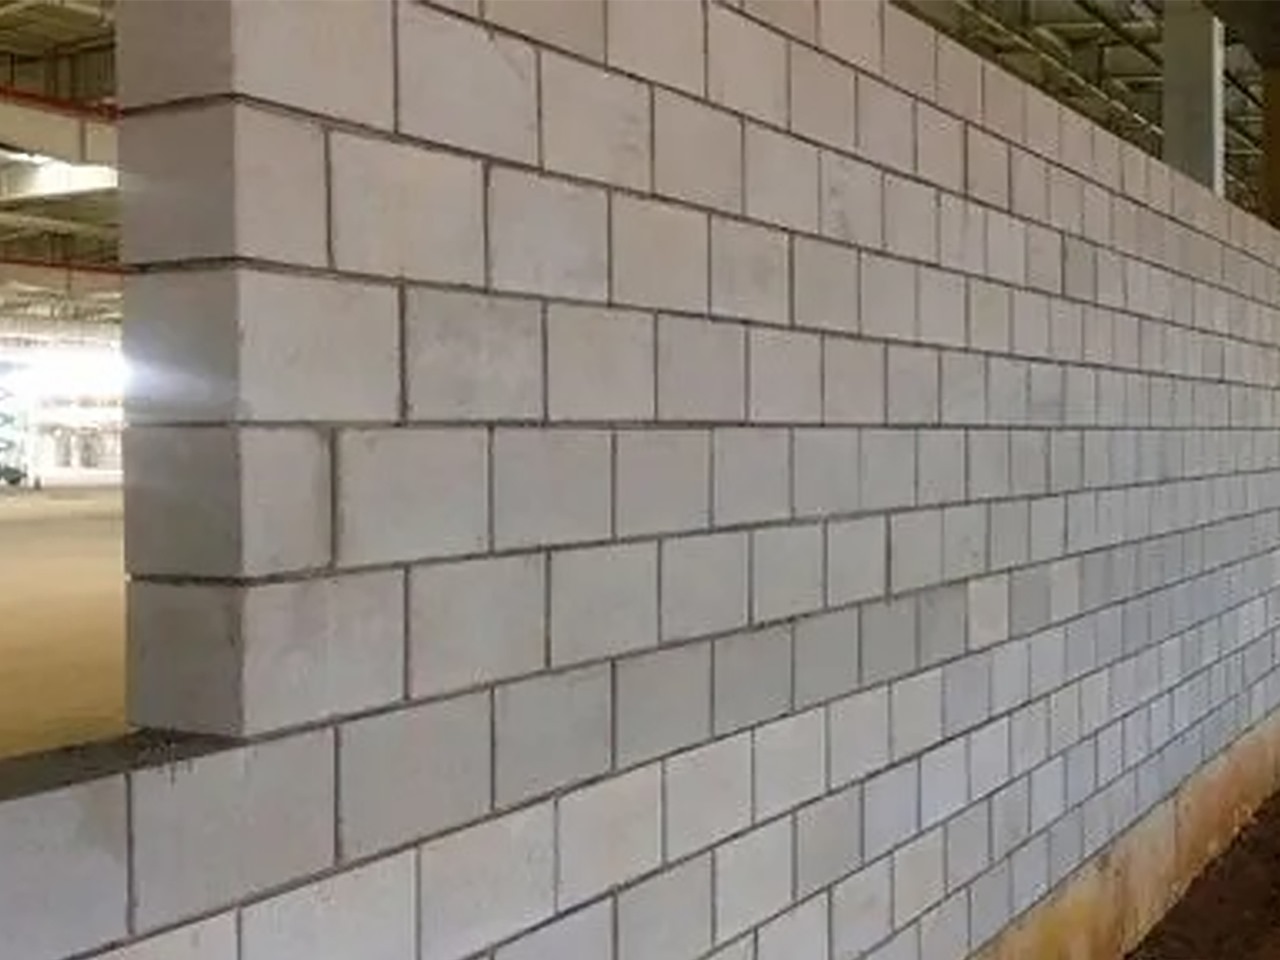
- Brick Masonry: Traditional and widely used; provides strength, durability, and aesthetics. Suitable for both load-bearing and partition walls.
- Concrete Block Masonry: Faster to install, offers better sound insulation, and is often used in commercial and high-rise buildings.
- AAC (Autoclaved Aerated Concrete) Blocks: Lightweight, eco-friendly, and thermally efficient ideal for modern constructions.
Partition Walls:
Partition walls are non-load-bearing elements that define interior spaces. These walls can be made from:
- Bricks or blocks (for permanent partitions)
- Gypsum boards or drywall (for flexible and faster installations)
- Glass panels or aluminum frames (for modern or commercial interiors)
Construction Process:
The masonry and partition wall work involves several critical steps:
- Marking & Layout: The wall lines are marked on slabs based on approved architectural plans.
- Mortar Preparation: Cement mortar or adhesives are mixed to bind bricks or blocks securely.
- Brick/Block Laying: Units are laid in staggered joints (English bond, stretcher bond, etc.) to improve strength and bonding.
- Plumb & Level Checks: Walls are constantly checked with spirit levels and plumb bobs to ensure verticality and alignment.
- Opening Provisions: Door and window gaps are left as per design, with concrete or lintel supports installed above.
Curing and Surface Preparation:
After the walls are constructed:
- They are cured regularly with water to prevent cracks and enhance strength.
- Surface leveling is done to prepare walls for plastering, tiling, or cladding in later stages.
Integration with Services:
Before closing wall chases, electrical and plumbing conduits are inserted within the masonry. Proper coordination with MEP (Mechanical, Electrical, Plumbing) teams is vital to avoid future damage.
This step plays a key role in determining the final layout and comfort of interior spaces blending strength with precision and preparing the structure for the finishing phase.
Step 6: Plumbing, Electrical & HVAC Installations
This critical phase involves embedding the lifelines of the building water supply, drainage, electrical systems, and heating, ventilation, and air conditioning (HVAC). These systems must be carefully planned, coordinated, and executed to ensure safety, efficiency, and comfort for future occupants.
🔧 Plumbing System Installation
Plumbing works include:
- Water Supply Lines: Laid out to deliver clean water to bathrooms, kitchens, gardens, and utility areas using PVC, CPVC, or PPR pipes.
- Drainage & Sewer Lines: Underground and internal piping to carry wastewater safely to septic tanks or municipal sewers.
- Rainwater Drainage: Gutters and downspouts are installed for effective roof runoff management.
- Fixture Outlets: Provisions for taps, showers, toilets, sinks, and water heaters are made before wall finishes.
⚡ Electrical Wiring & Fittings
Electrical installation must comply with safety codes and load requirements:
- Conduits & Wiring: Concealed or surface-mounted conduits are laid in walls/slabs for light points, sockets, fans, and switches.
- Main Distribution Board: Includes circuit breakers (MCBs) and safety devices (RCDs/ELCBs) for load management and protection.
- Earthing System: Grounding rods or pits are installed to prevent electrocution and protect appliances from surges.
- Provisions for Internet, CCTV, Intercom: Cabling is embedded for future smart integrations.
🌬️ HVAC (Heating, Ventilation & Air Conditioning)
HVAC systems ensure indoor air quality and temperature control, especially in commercial or high-end residential buildings:
- Ductwork: Metallic or insulated ducts are run through ceilings or walls for air distribution.
- Air Handling Units (AHUs): Installed to regulate and circulate air efficiently across spaces.
- Split or Central AC Installations: Refrigerant and drainage lines are embedded in advance.
- Exhaust Fans & Fresh Air Inlets: Fitted for bathrooms, kitchens, and enclosed spaces.
🛠️ Coordination and Safety Checks
These services are coordinated across architectural and structural drawings to avoid clashes. After installation:
- Systems are tested for leakage, load handling, and insulation.
- Inspections are done before wall finishes are applied.
- Future provisions for maintenance access are left open.
A successful services phase ensures long-term comfort, reliability, and energy efficiency in the building. Precise planning and professional execution are essential to avoid costly post-construction repairs.
Step 7: Plastering & Surface Finishes
Once the internal systems are in place, the building's interior and exterior walls are prepared for final treatments. This begins with plastering — a process that levels and protects surfaces followed by aesthetic finishes that bring design to life.
🧱 Internal and External Plastering
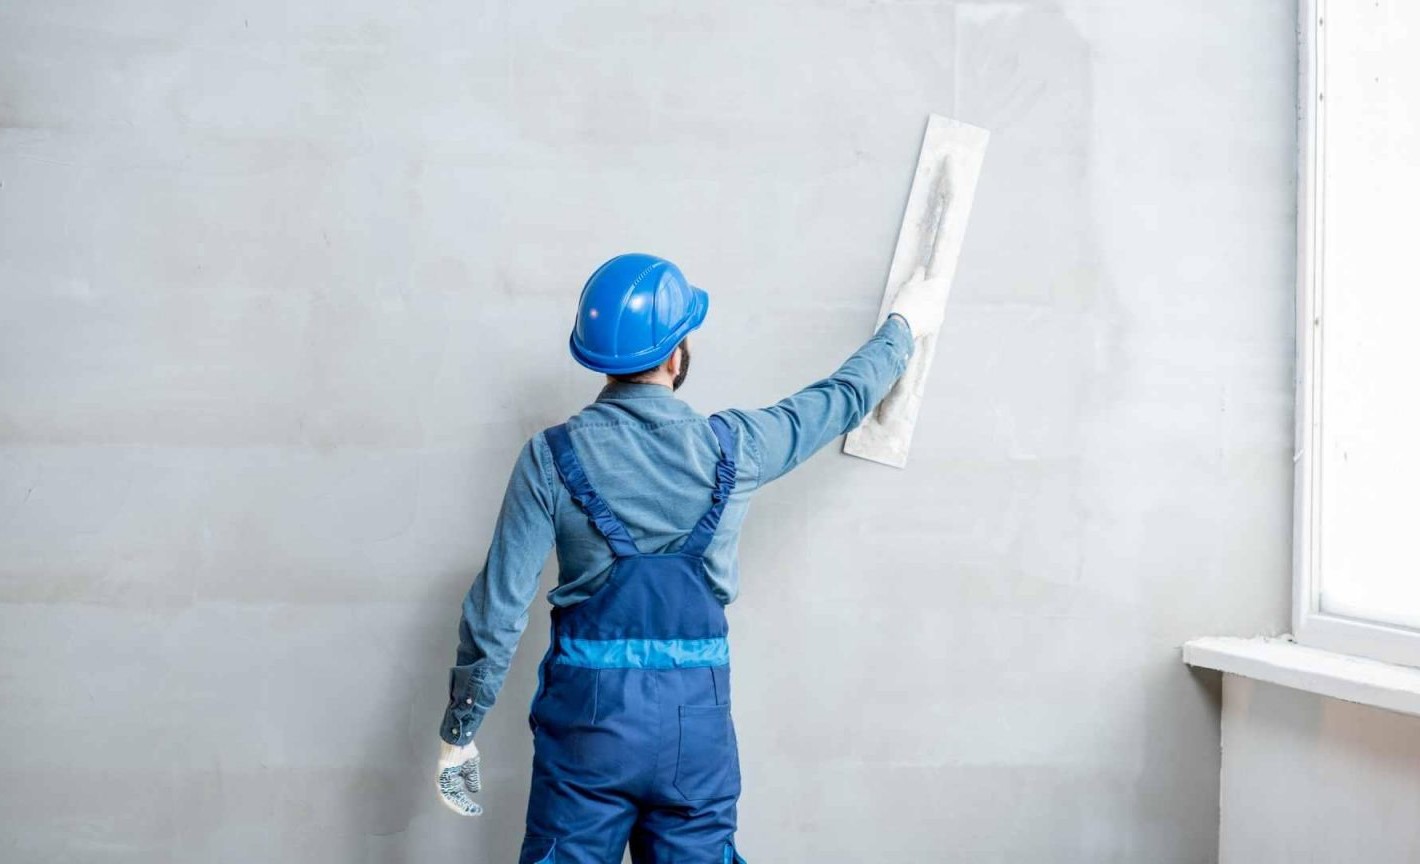
Plastering is done using cement-sand mortar applied in one or two coats. The goal is to:
- Provide a smooth and even surface
- Hide electrical conduits, plumbing chases, and brick/block joints
- Protect walls from moisture and weather damage
Internal walls are often finished with white cement or POP (Plaster of Paris) to achieve finer textures, especially in luxury spaces.
🏗️ Ceiling Finishing
Ceilings are treated with plaster, POP designs, or gypsum boards. This may include:
- False ceiling frames for lighting fixtures
- Surface leveling to remove slab imperfections
- Decorative moldings or coffered patterns
🎨 Surface Finishing Materials
After plastering and curing, various surface treatments are applied:
- Primer: Seals the surface and prepares it for final coating
- Putty: Smoothens minor undulations, cracks, or nail holes
- Paint: Emulsion, texture, or weatherproof paints are applied depending on wall location
- Cladding or Tiles: Decorative stone, wood, or ceramic finishes for feature walls and wet areas
🛠️ Surface Preparation Process:
- Cleaning and wetting walls before plaster application
- Mixing and applying plaster in uniform layers
- Leveling and troweling to achieve smoothness
- Regular curing with water to prevent cracks and shrinkage
A well-executed plastering and finishing phase not only prepares the building for its final look but also increases its life and structural resilience. This sets the stage for tiling, painting, and decorative interior work.
Step 8: Flooring & Tiling
Flooring and tiling mark the beginning of interior finishes. These not only contribute to the look and feel of the space but also ensure durable, clean, and functional surfaces throughout the building.
1. Subfloor Preparation:
The concrete slab must be dry, level, and free from dust or cracks. Any undulations are corrected with screed. Waterproofing is essential in wet areas like bathrooms and balconies before tile application.
2. Types of Flooring Materials:
- Ceramic & Vitrified Tiles: Ideal for general flooring due to durability and variety.
- Granite & Marble: Luxurious natural stone used in premium spaces.
- Wooden or Laminated Flooring: Adds warmth to bedrooms and lounges.
- Vinyl or PVC Flooring: Cost-effective and suitable for wet or commercial areas.
3. Tiling Procedure:
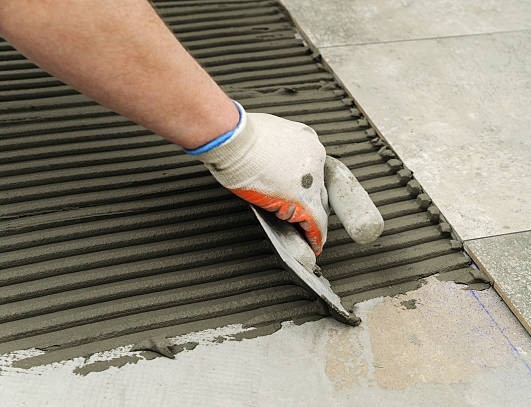
- Dry Layout: Position tiles before fixing to align cuts and borders.
- Adhesive Application: Spread tile adhesive with a notched trowel.
- Tile Laying: Place and level tiles using spacers and tapping tools.
- Curing & Joint Cleaning: Allow curing time and clean joints before grouting.
4. Grouting & Finishing:
Grout is filled after tiles are fixed and cured, ensuring sealed joints. Silicone sealant is applied in wet corners. Final cleaning and polishing deliver a seamless finish.
5. Best Practices:
- Ensure proper slope (1:100) in bathrooms and balconies.
- Avoid foot traffic for 24–48 hours post-laying.
- Use leveling clips for large-format tiles to avoid unevenness.
Proper tiling and flooring not only enhance the beauty of the structure but also increase functionality and ease of maintenance in the long term.

Step 9: Painting, Fixtures & Final Touches
Once the primary construction and interior surfaces are completed, the focus shifts to painting, installation of fixtures, and final detailing. This step elevates the aesthetic appeal of the structure and completes its functional usability.
1. Surface Preparation:
Walls and ceilings are first cleaned, filled, and sanded to ensure a smooth base. Primer is applied to seal the surface and improve paint adhesion.
2. Types of Paints & Coatings:
- Emulsion Paint: Commonly used for interior walls due to durability and easy cleaning.
- Enamel Paint: Used on doors, windows, and metal surfaces for a glossy finish.
3. Fixture Installation:
- Electrical: Switchboards, lights, ceiling fans, and smart controls are fitted.
- Plumbing: Sanitary fixtures like washbasins, taps, showers, and geysers are installed.
- Hardware: Door handles, locks, curtain rods, and cabinetry fittings are fixed.
4. Final Finishes & Cleaning:
The final coat of paint is applied, ensuring consistency and touch-ups where required. The space undergoes thorough cleaning to remove paint splashes, dust, and construction residues.
5. Quality Inspection:
- Check alignment and operation of doors, drawers, and windows.
- Test lighting, switches, water flow, and fixture stability.
- Verify finish uniformity and correct any blemishes or leaks.
This final stage ensures that every element of the structure is functional, aesthetically refined, and ready for occupancy. Attention to detail here can make a lasting impression and enhance the user experience significantly.
Step 10: Inspection & Handover
The final stage of any construction project is the formal inspection and handover of the property. This step ensures everything is complete, safe, and compliant before the building is officially occupied or used.
1. Final Site Walkthrough:
A detailed site walkthrough is conducted with the client, contractor, and project manager. Each room, utility, and exterior area is examined for completeness, finish quality, and functionality.
2. Snag List (Punch List):
- Minor Defects: Unfinished paint, loose handles, misaligned doors, or minor leaks.
- Rectification Schedule: A documented list with deadlines for fixing all pending issues.

3. Documentation & Training:
The owner is provided with a complete set of documents including:
- Architectural and structural drawings
- Completion certificates, warranties, and inspection reports
- User manuals for equipment and maintenance schedules
4. Formal Handover:
Once the client is satisfied and all snag items are addressed, a formal handover certificate is signed. Keys, access cards, and digital access (if applicable) are officially transferred.
This step marks the culmination of months of planning and execution. A smooth handover reflects a successful project and fosters long-term client satisfaction and trust.


